
This takes about 20-30 minutes.
Transactional emails are emails you send to your customers when you need to notify them of certain actions they have taken or they have to take. For example, if you sell physical goods online, you would need to send your customers a receipt or invoice whenever they buy something. If you run a consulting business where your customers can make an appointment with you, you would send them a confirmation email after they’ve made one.
In the simple example, we will use an example of an app that helps you back up your legacy ASP.NET applications called Blippy.
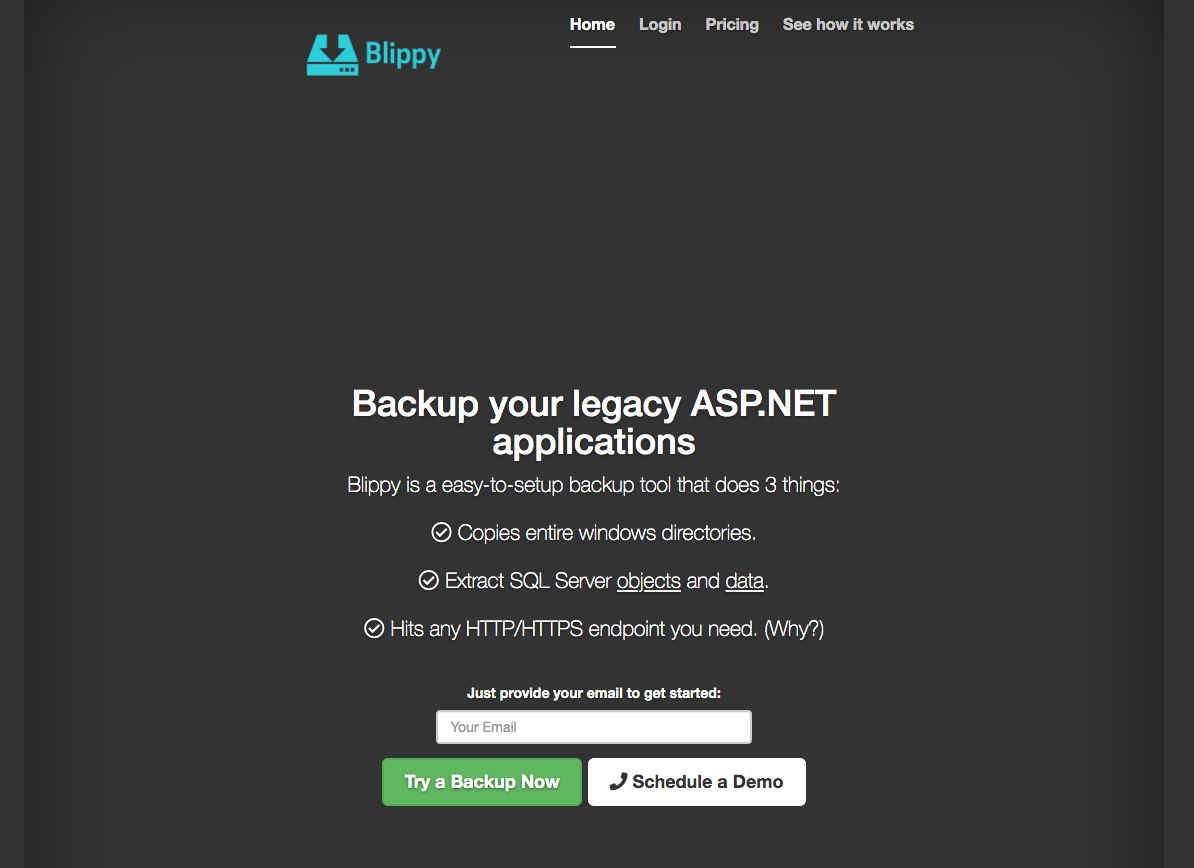
Blippy lets customers set up daily, weekly or monthly backups of their Windows Server and SQL Server Databases, and pushes the backup files onto the customer’s own S3 buckets or Azure Blob Containers.
So every time after a backup has completed, Blippy has to:
- Notify their customer of the outcome of the backup (if completed successfully or failed for any reason)
- If successful, provide link to the S3 or Azure Blob Container location of their backup.
- If failed, provide link back to their Blippy dashboard where they can see the logs.
Let’s go through the requirements and see how to set up the Transactional Email in Segmail.
Notifying customers of either successful or failure
There are 2 ways of doing this:
- Creating a single Transactional Email template and have a {{BACKUP_STATUS}} placeholder, or
- Creating 2 separate Transactional Email templates for success and failure.
Let’s go with the 2nd approach in this case.
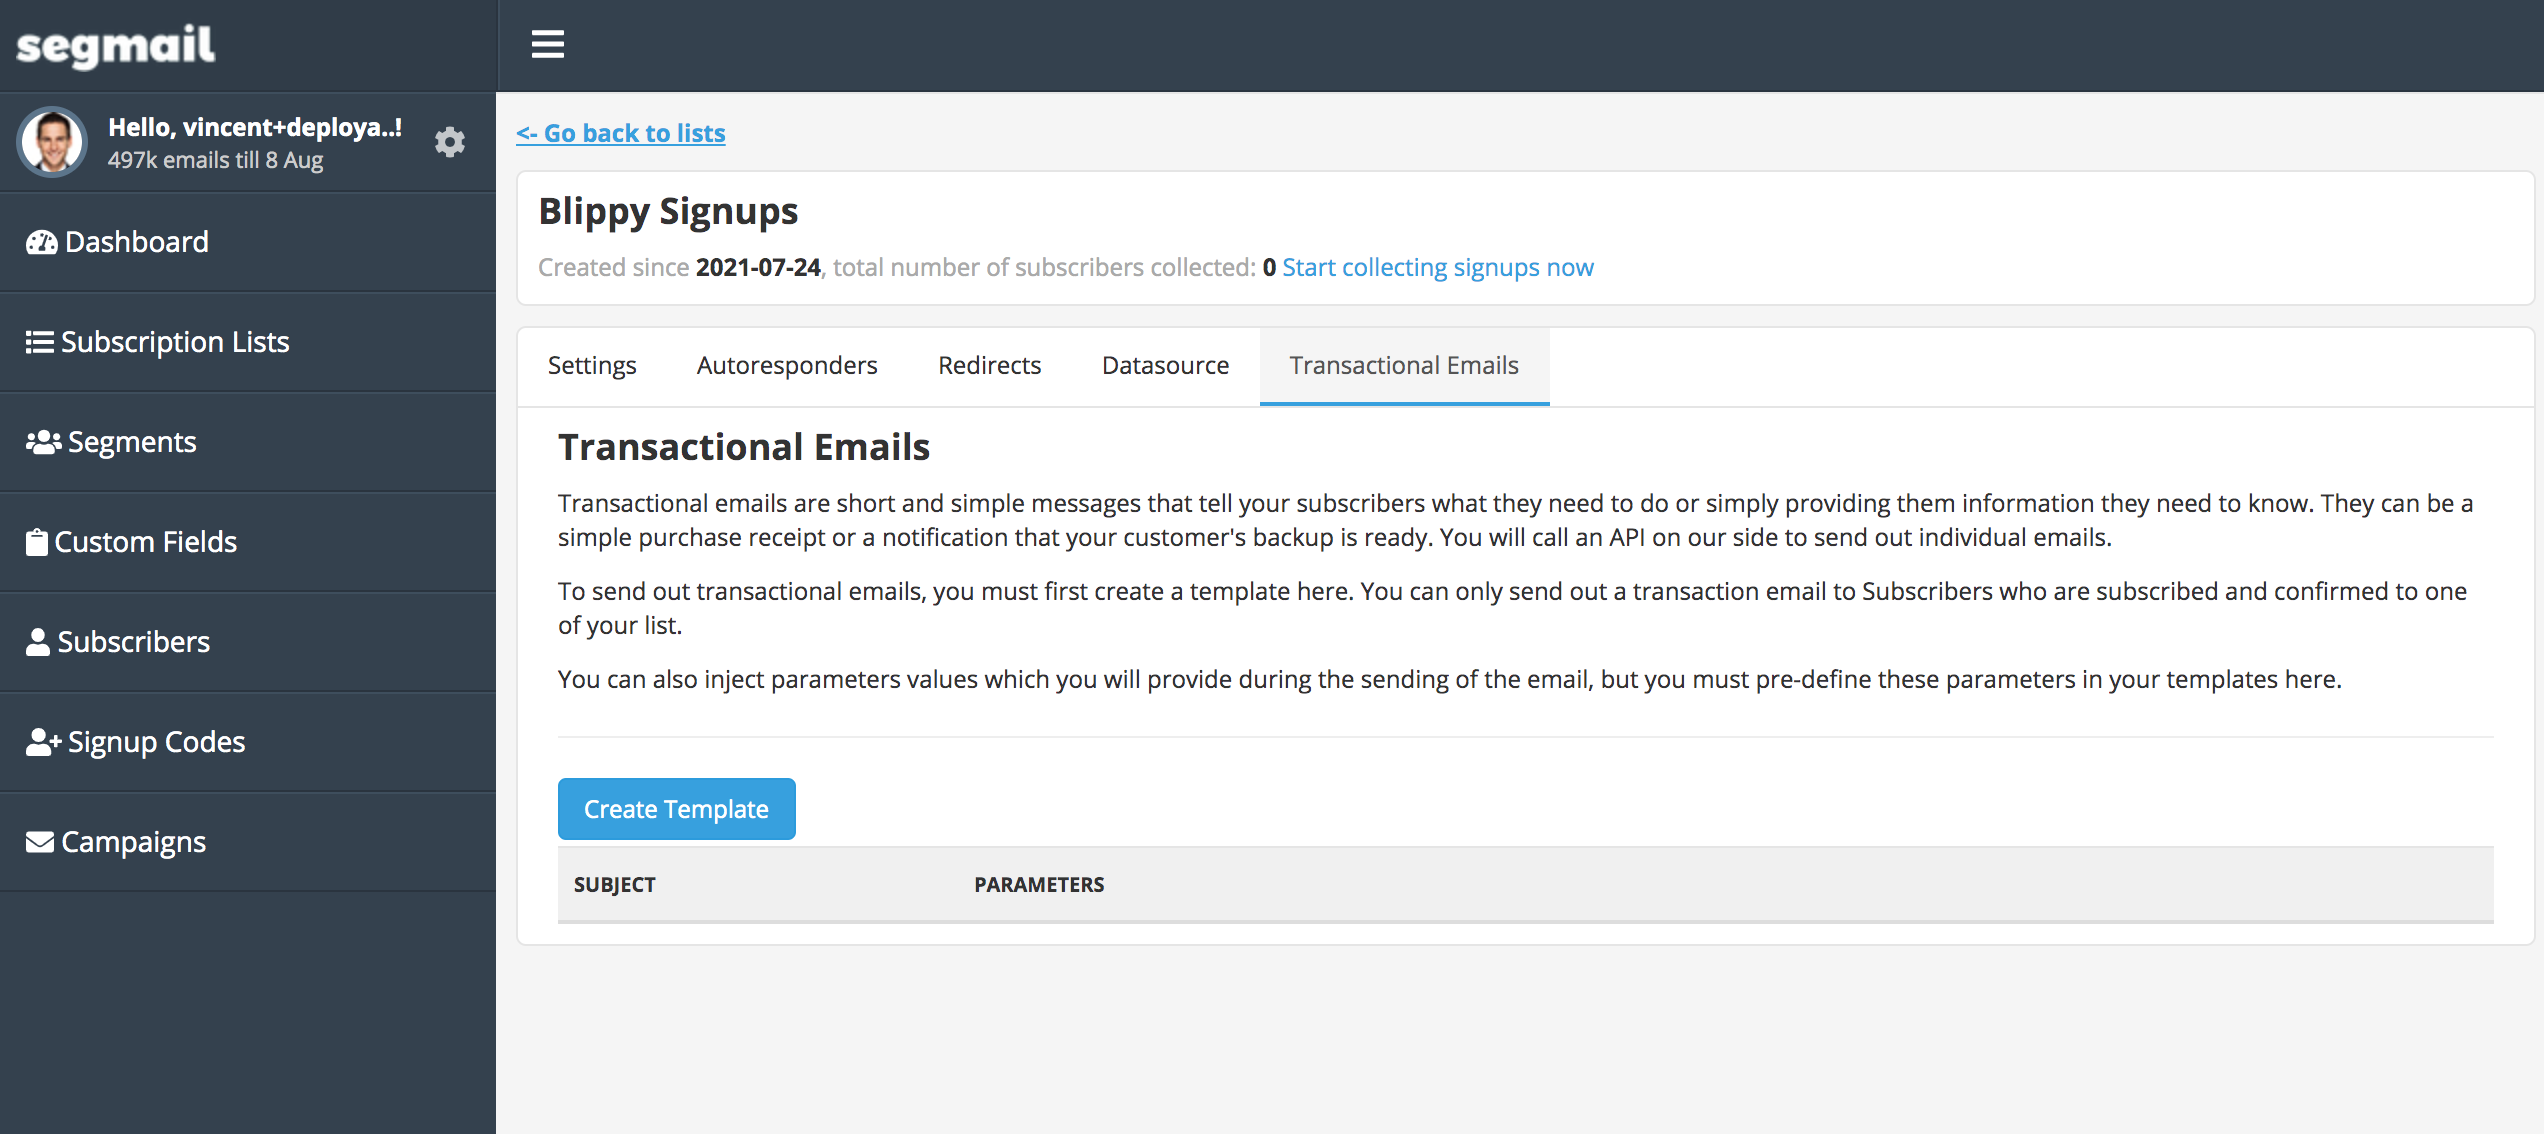
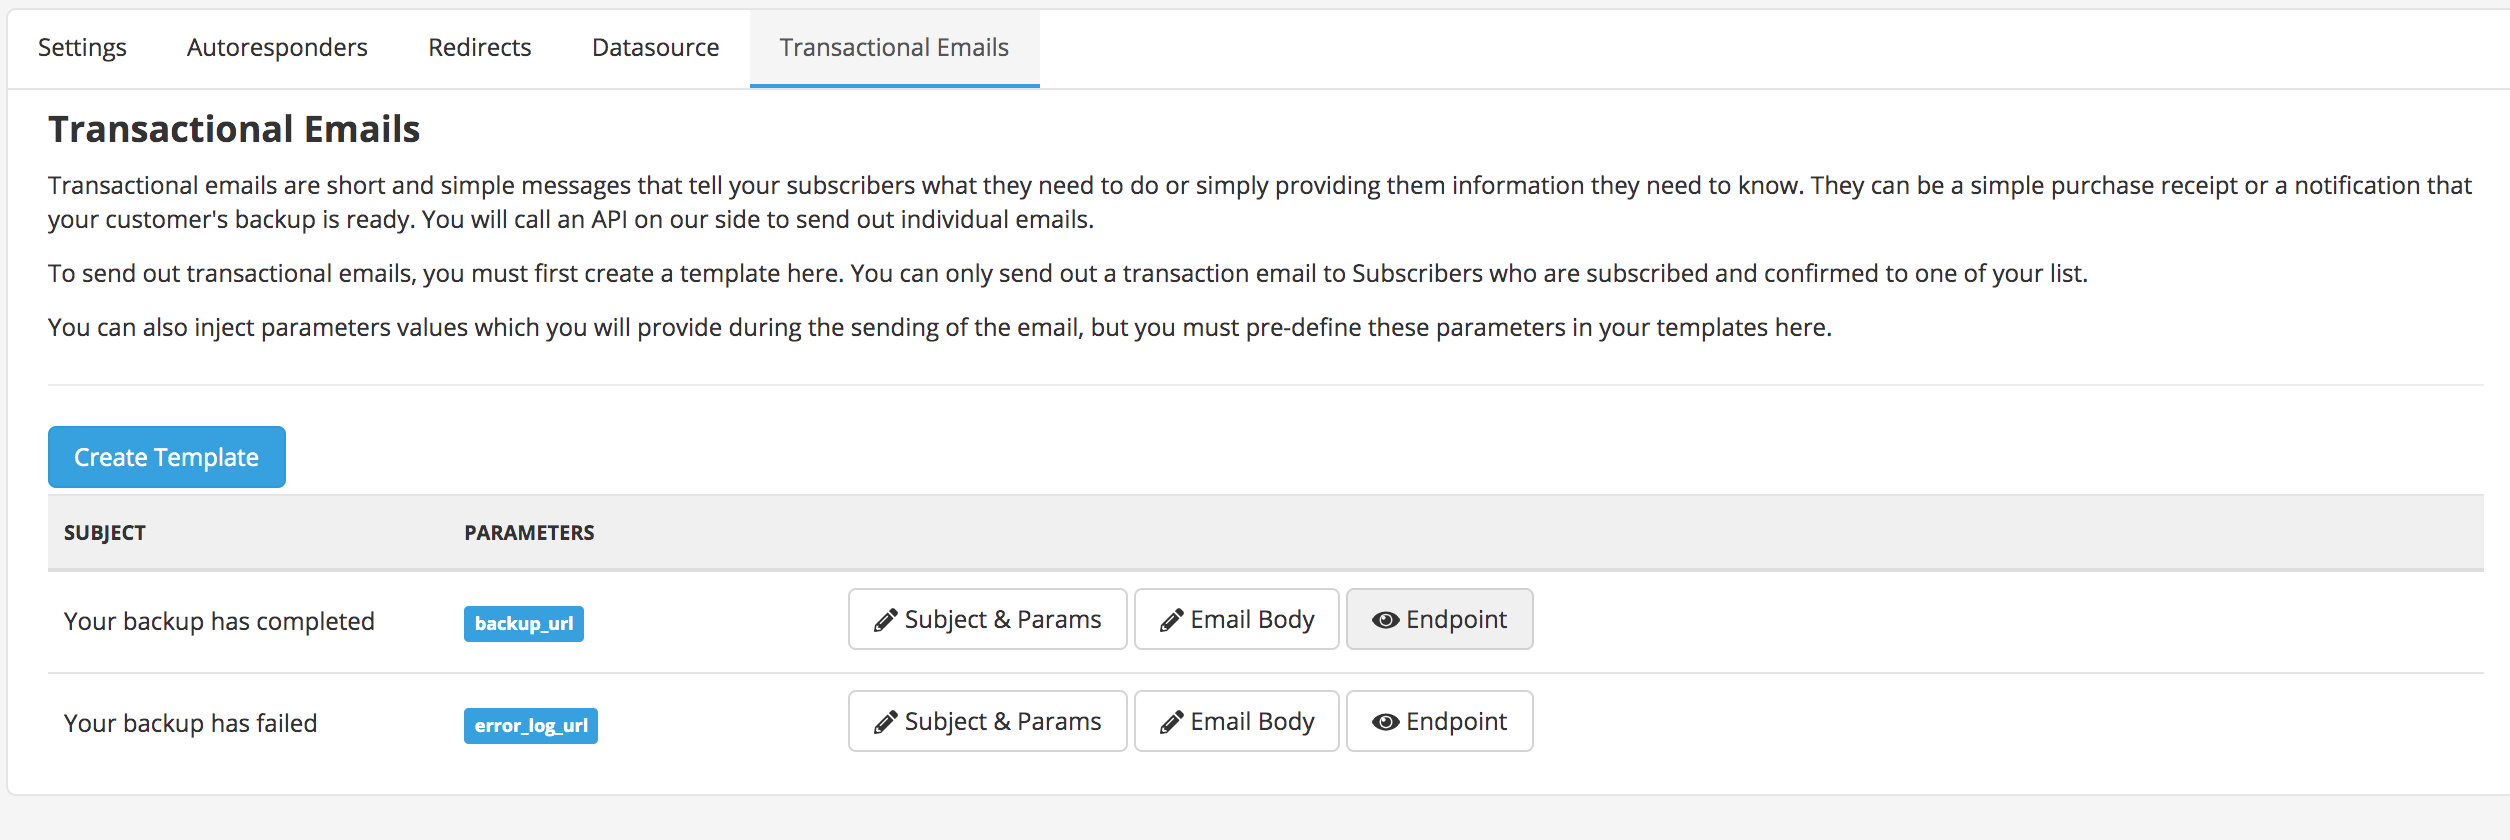
To see your Transactional Email templates, you have to navigate to the “Subscription Lists” page and select the list (Transactional Emails are tied to a particular list, and your subscriber must be subscribed and opted-in to this list) and click on the Transaction Emails tab:
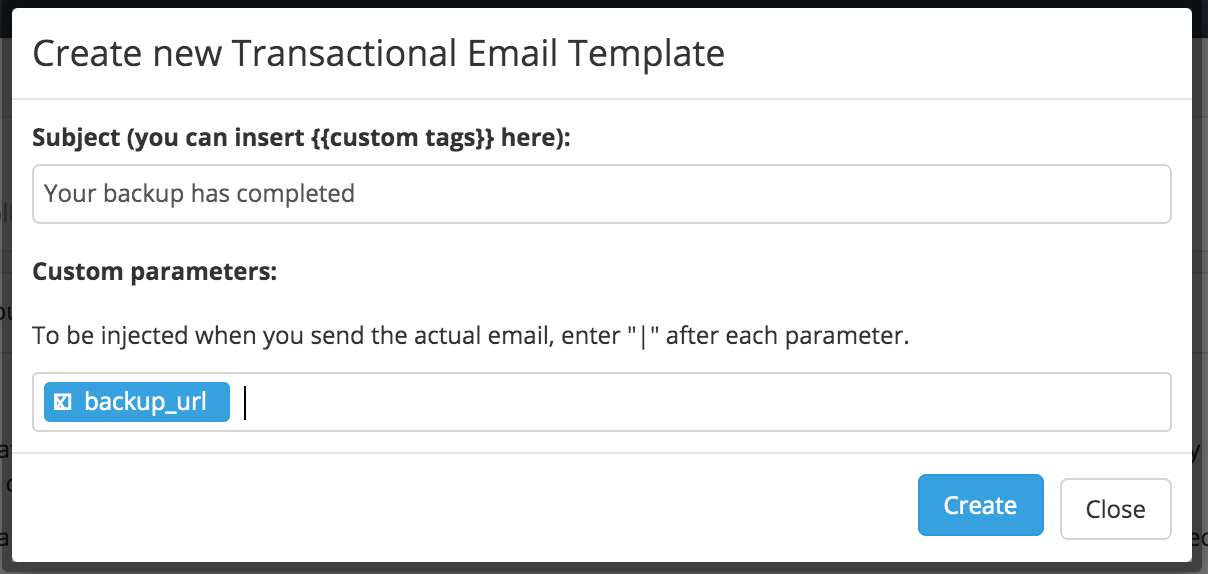
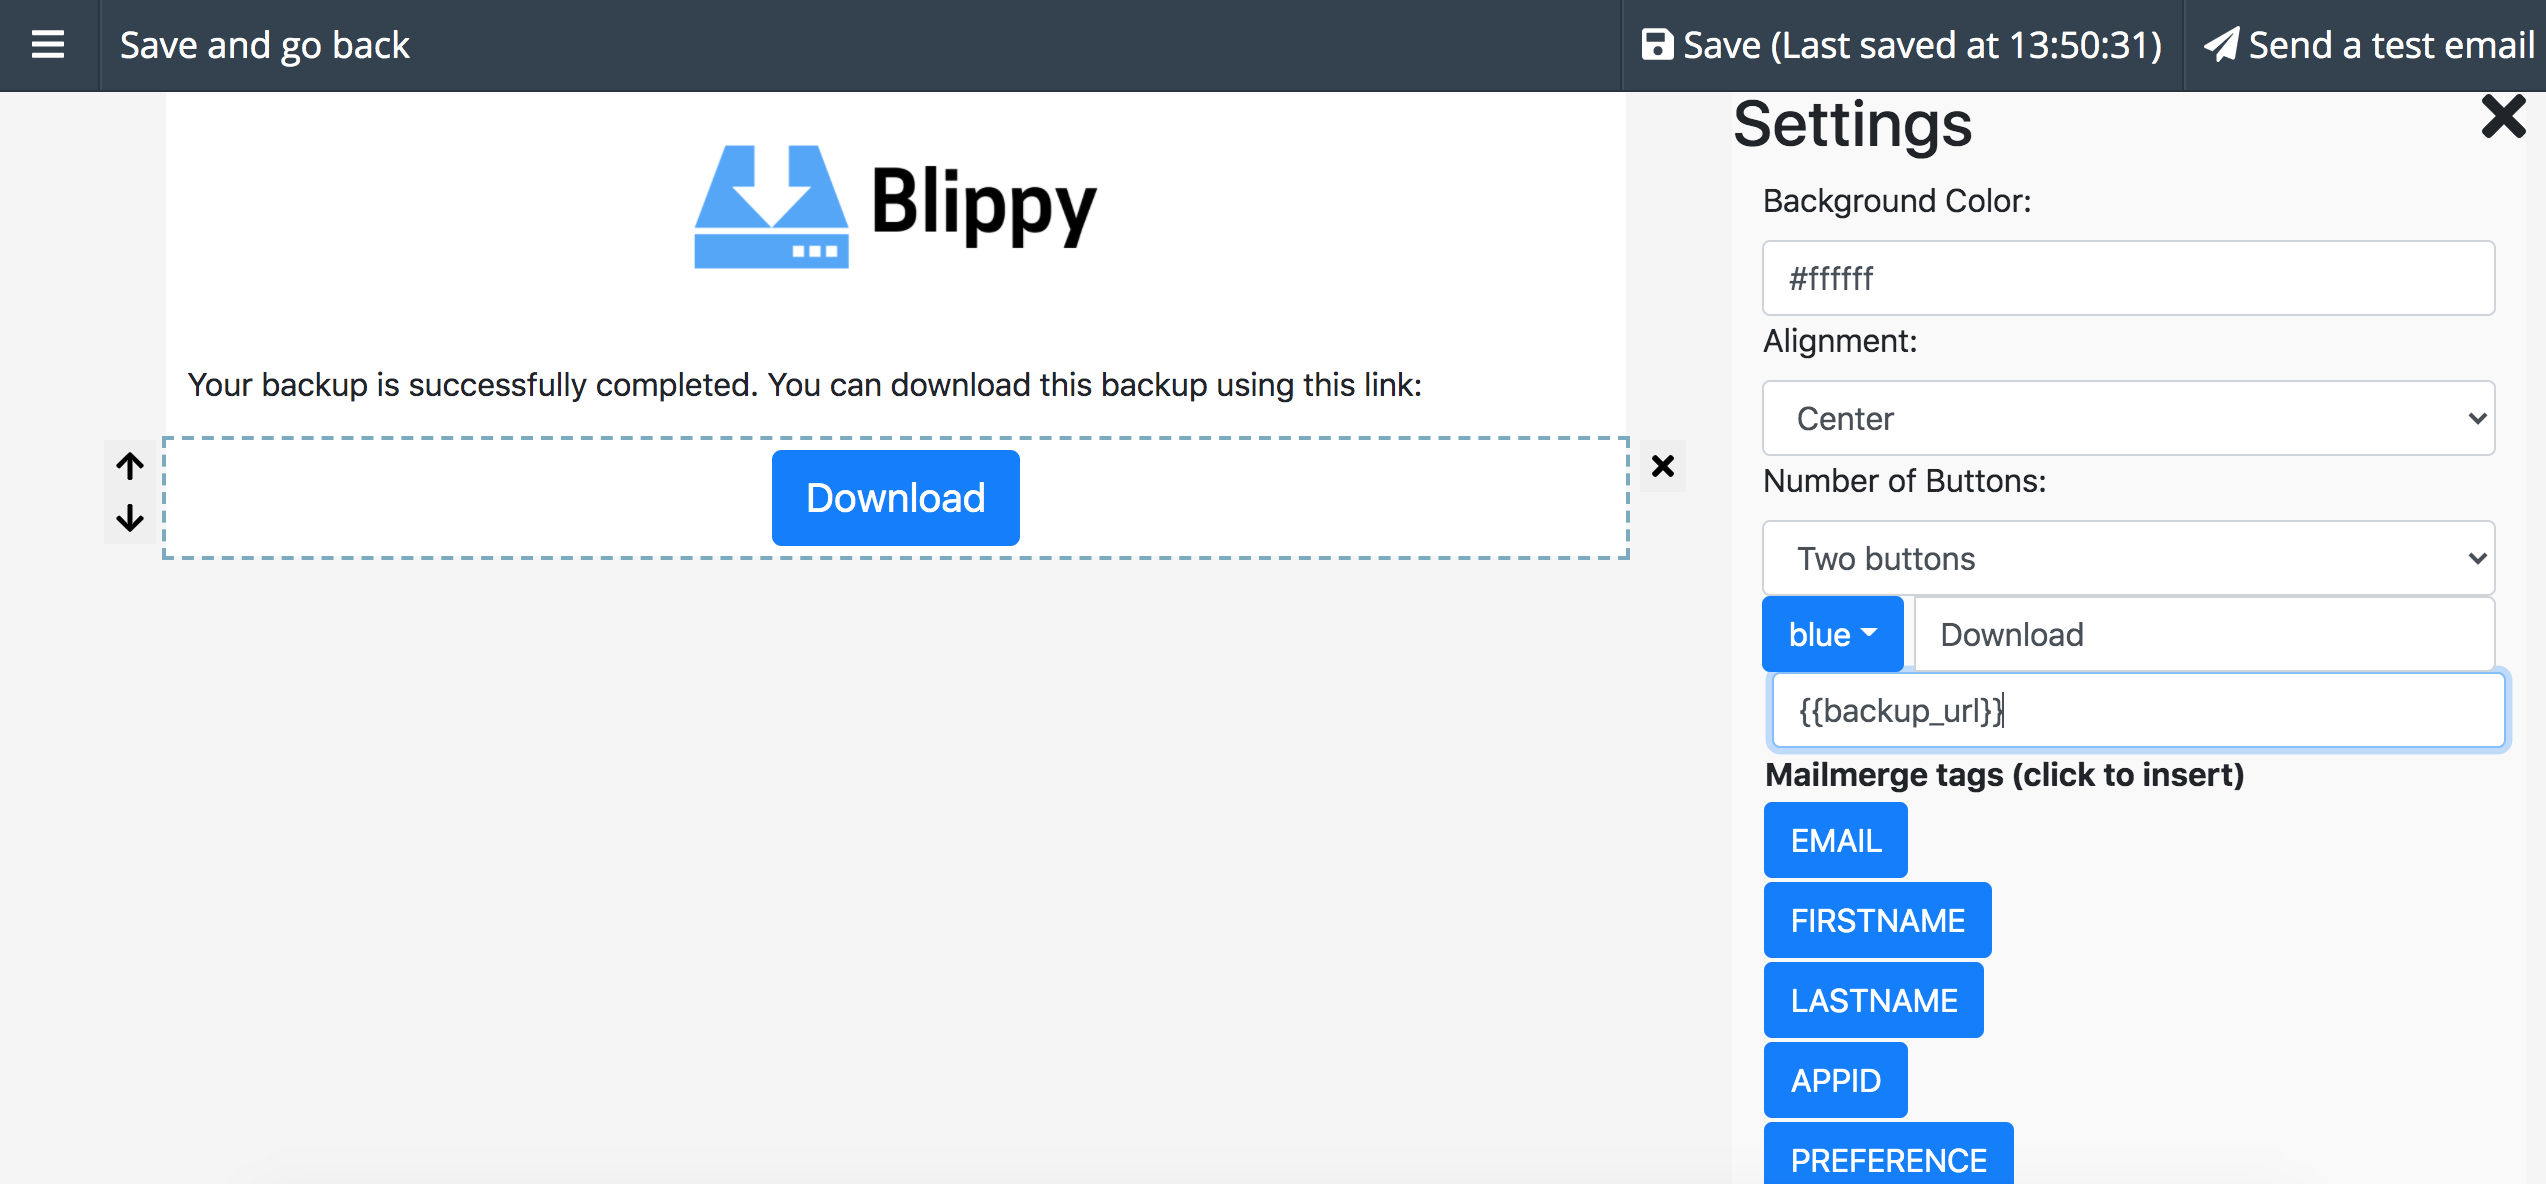
Click Create Template, and enter the subject as you want it. Under Custom parameters, enter parameter names that you want to inject values for in your template. For example, in the Successful email, we want to provide the backup_url of the backup package in the email, so we type “backup_url” and “|” after:
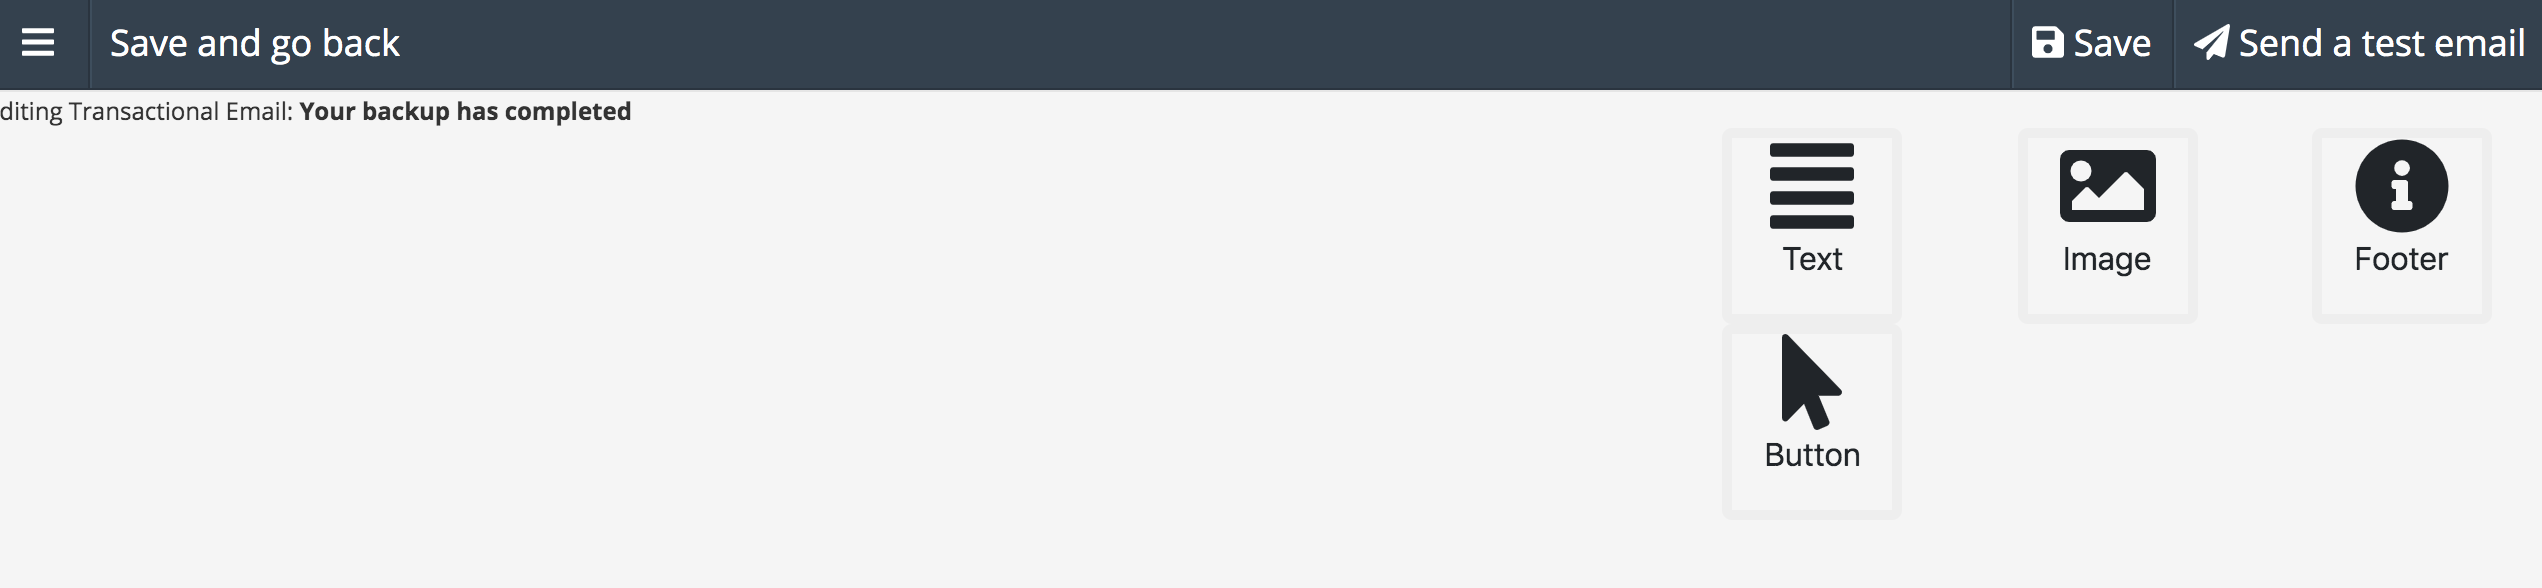
Click Create, then close the popup and click on Email Body to edit the email contents through the Segmail Email Inline Editor.

You will start with a blank template:
Start editing your template and inject the parameters you have entered earlier, like backup_url, by keying it in directly into a Button component’s url input on the right panel:
Don’t forget to add a Footer component! This is very important for your customer to unsubscribe if they want to.
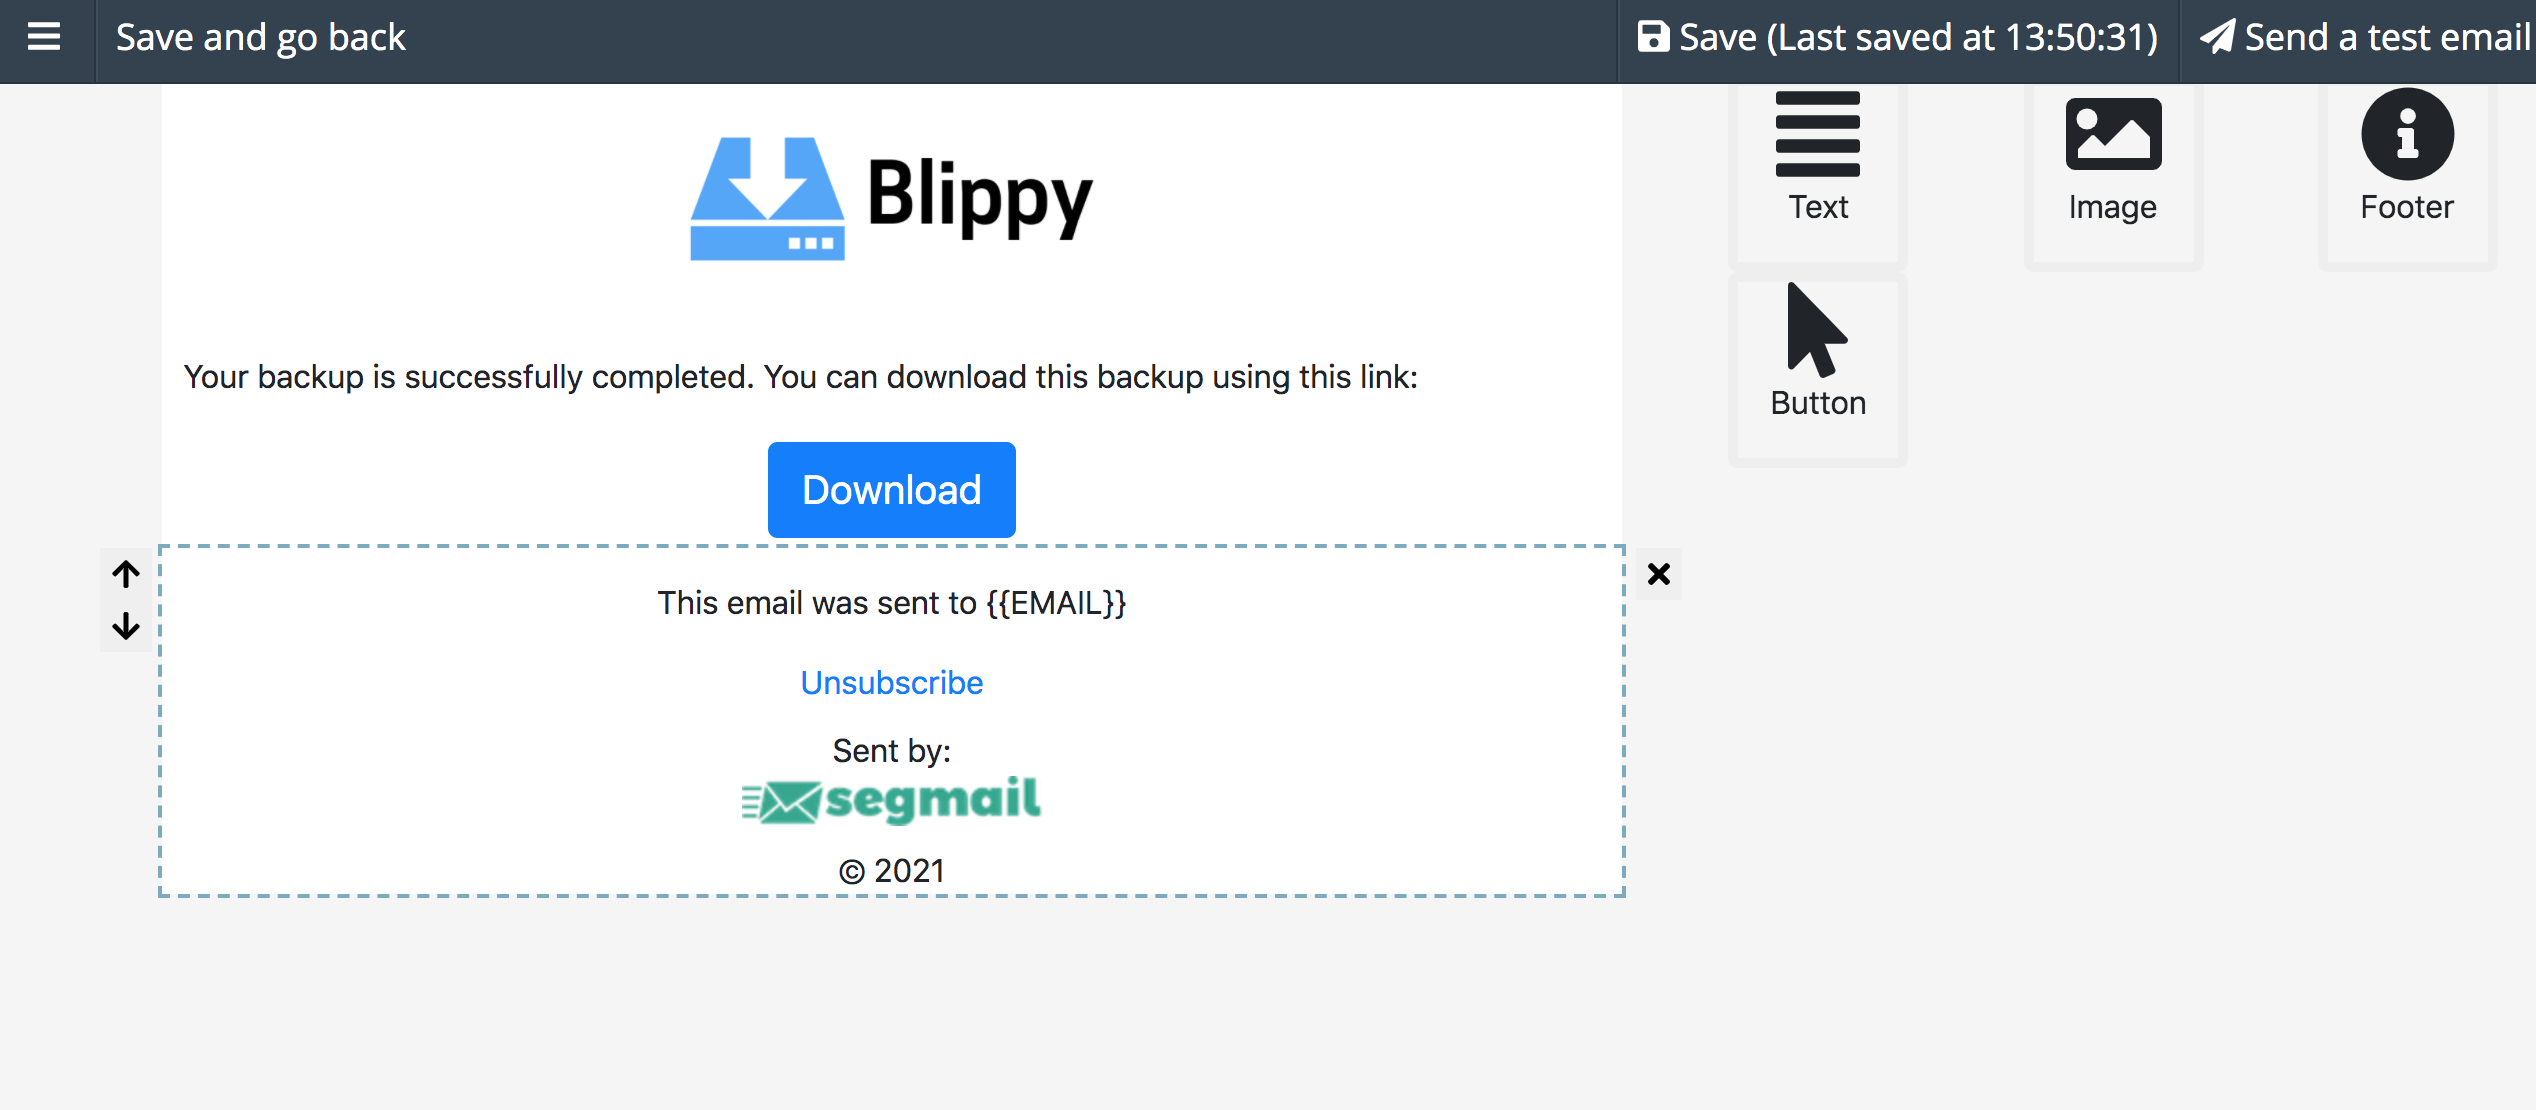
Click “Save and go back” and we would have 1. created a successful email template and 2. provide a link to the customer’s backup.
Creating a separate failure email template
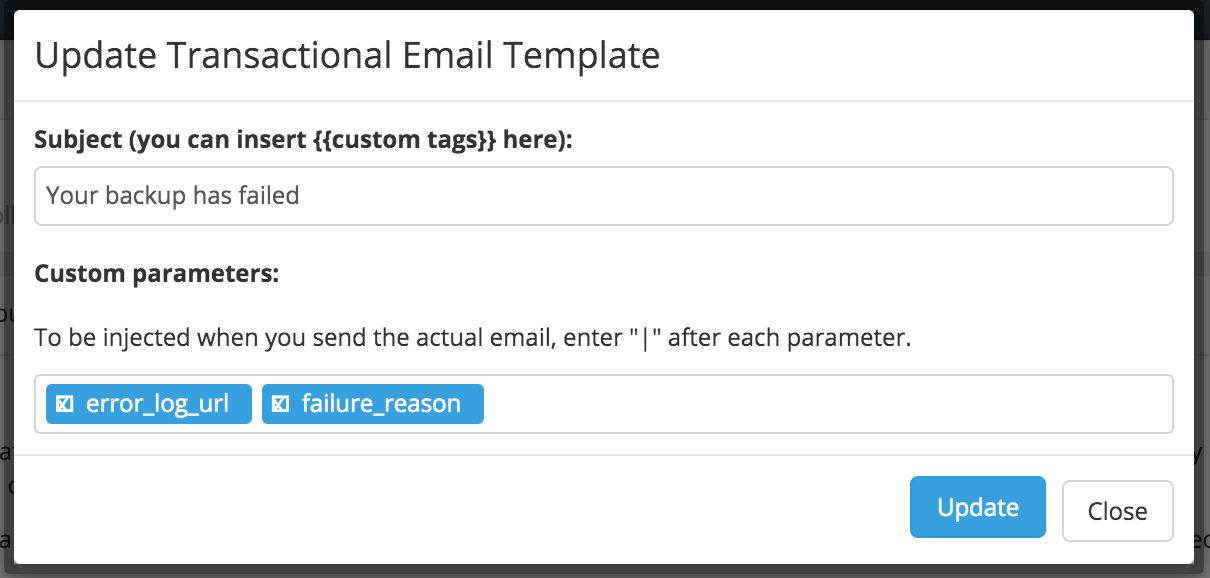
If the backup failed, we would also want to inform the customer, but this time we provide a link to the logs. We are going to create a different email template with different wording, this time we want to inject URL error_log_url. And for demo purposes, let’s also introduce a failure_reason in the email body as well.
Under the Subscription Lists -> Transactional Emails, click Create Template and enter the email subject and the parameters error_log_url and failure_reason:
Click Create, then Close, then Email Body to go to the editor.
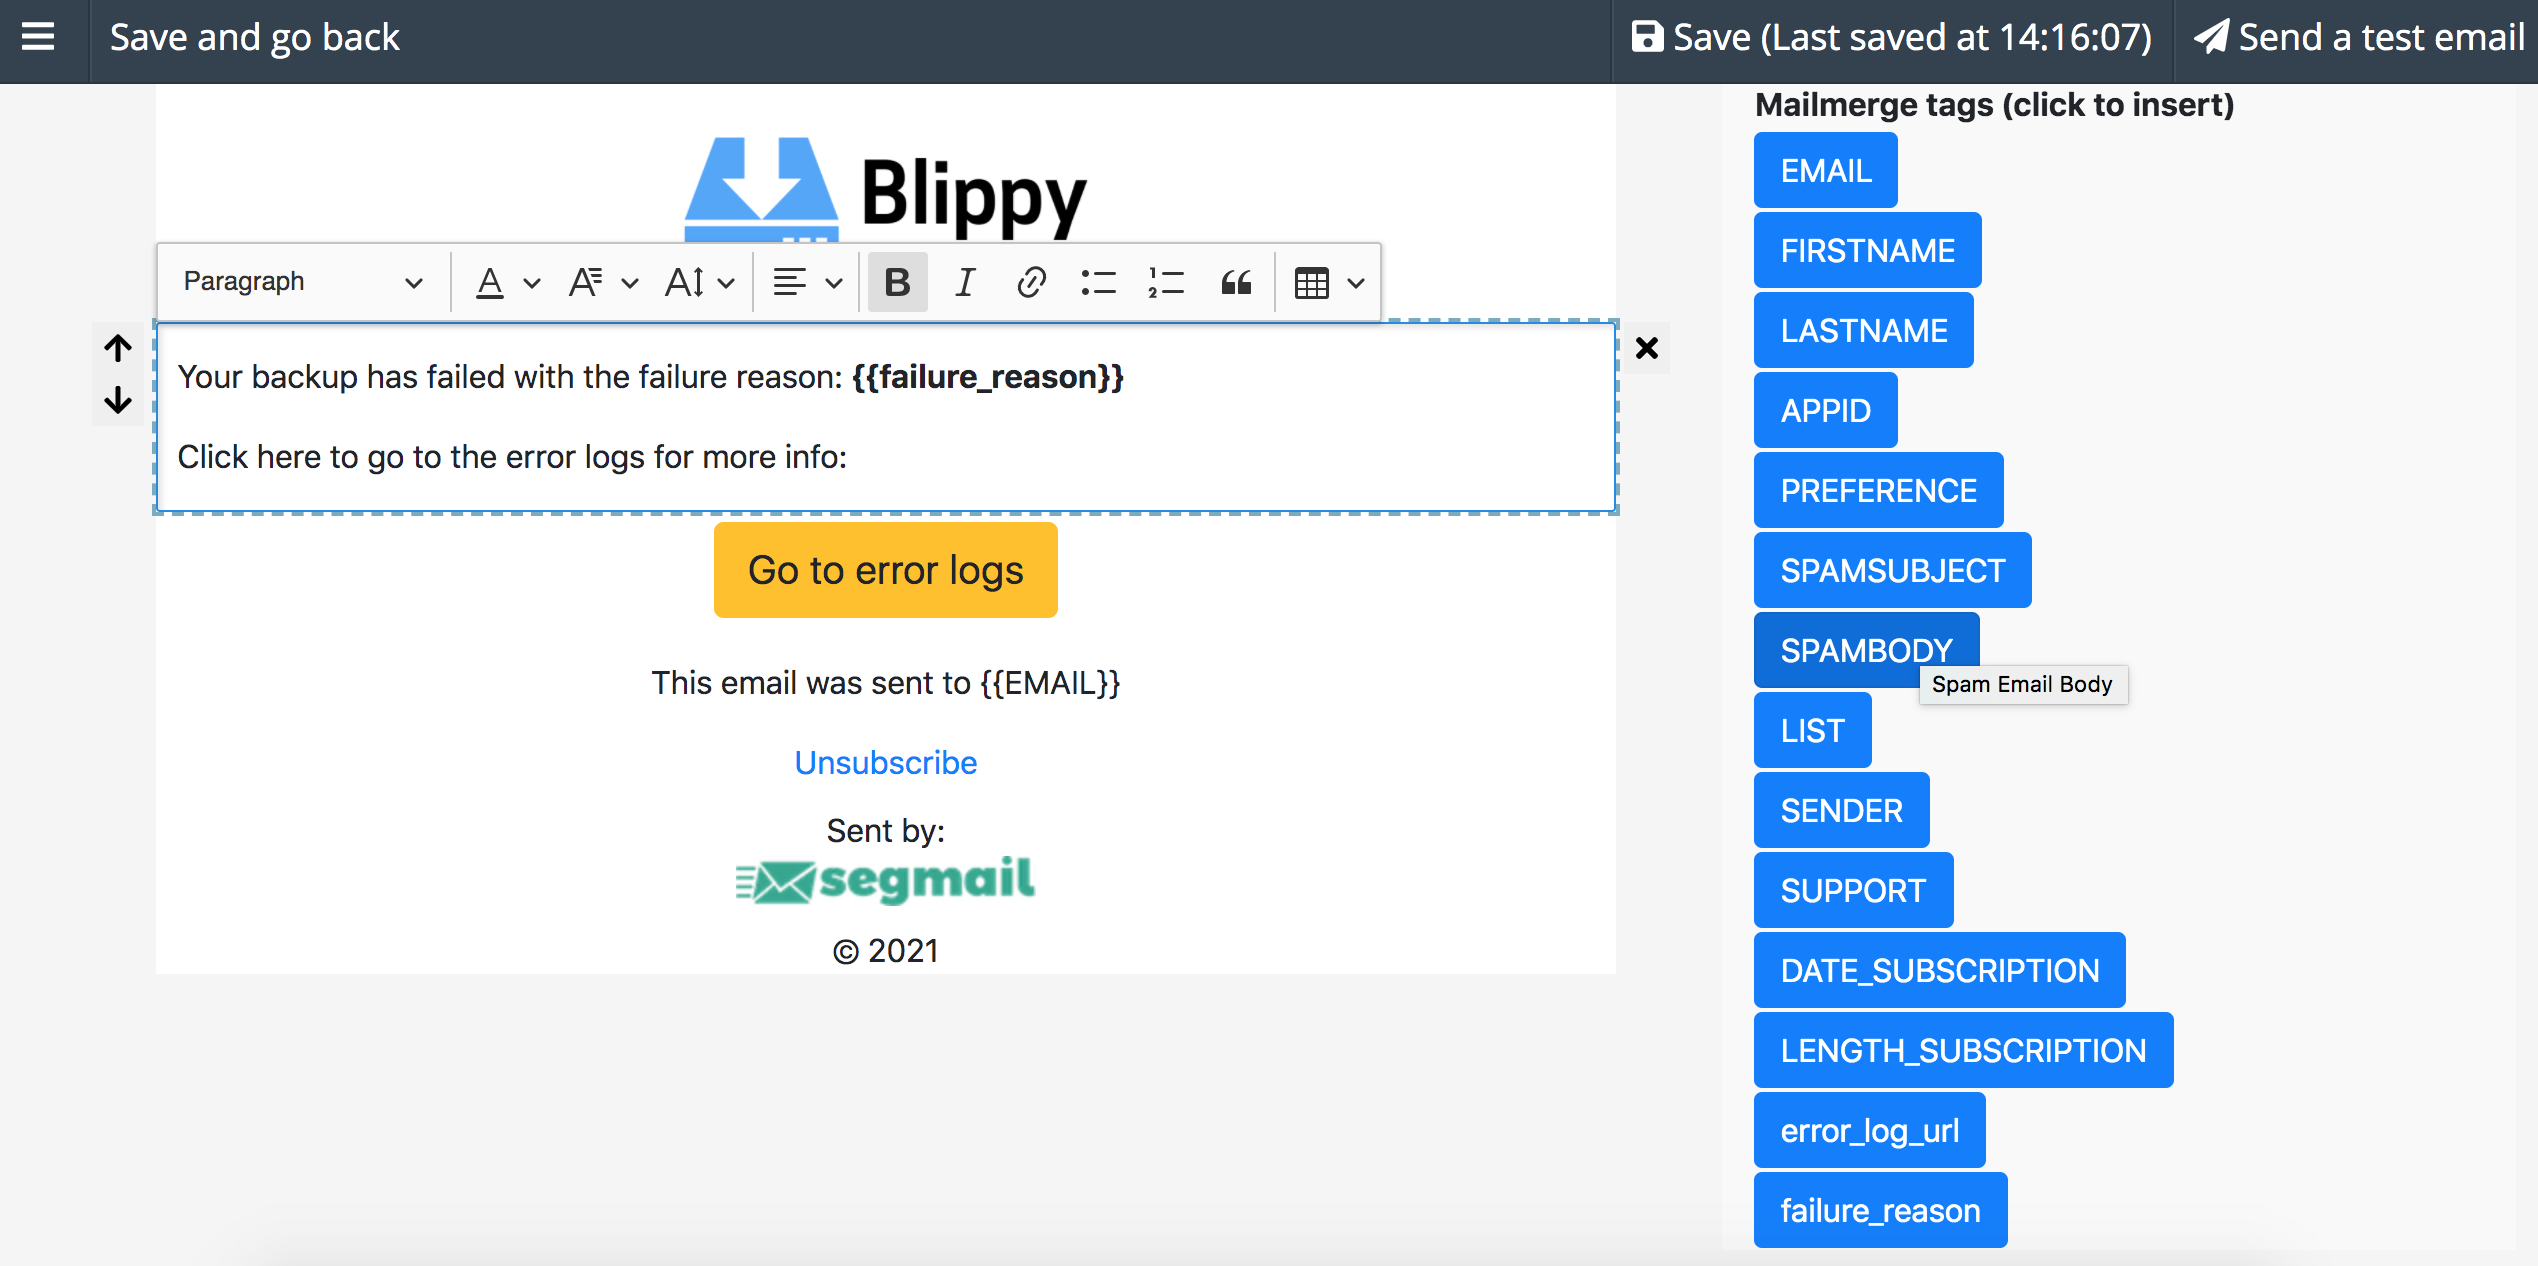
Enter {{error_log_url}} in the URL of the Button component and {{failure_reason}} in the message body. You should be able to see these 2 tags in the list of mailmerge tags at the right setting panel. Let’s also bold the failure_reason so that it stands out.
Alright, we are all set! Now it’s time to start triggering these emails.
Triggering Transactional Emails via API
In the Transactional Email tab, the endpoints are automatically generated. If you click on “Endpoint” button on the right most of each TE templates you have created:
You will then see a popup that tells you what the HTTP request should look like:
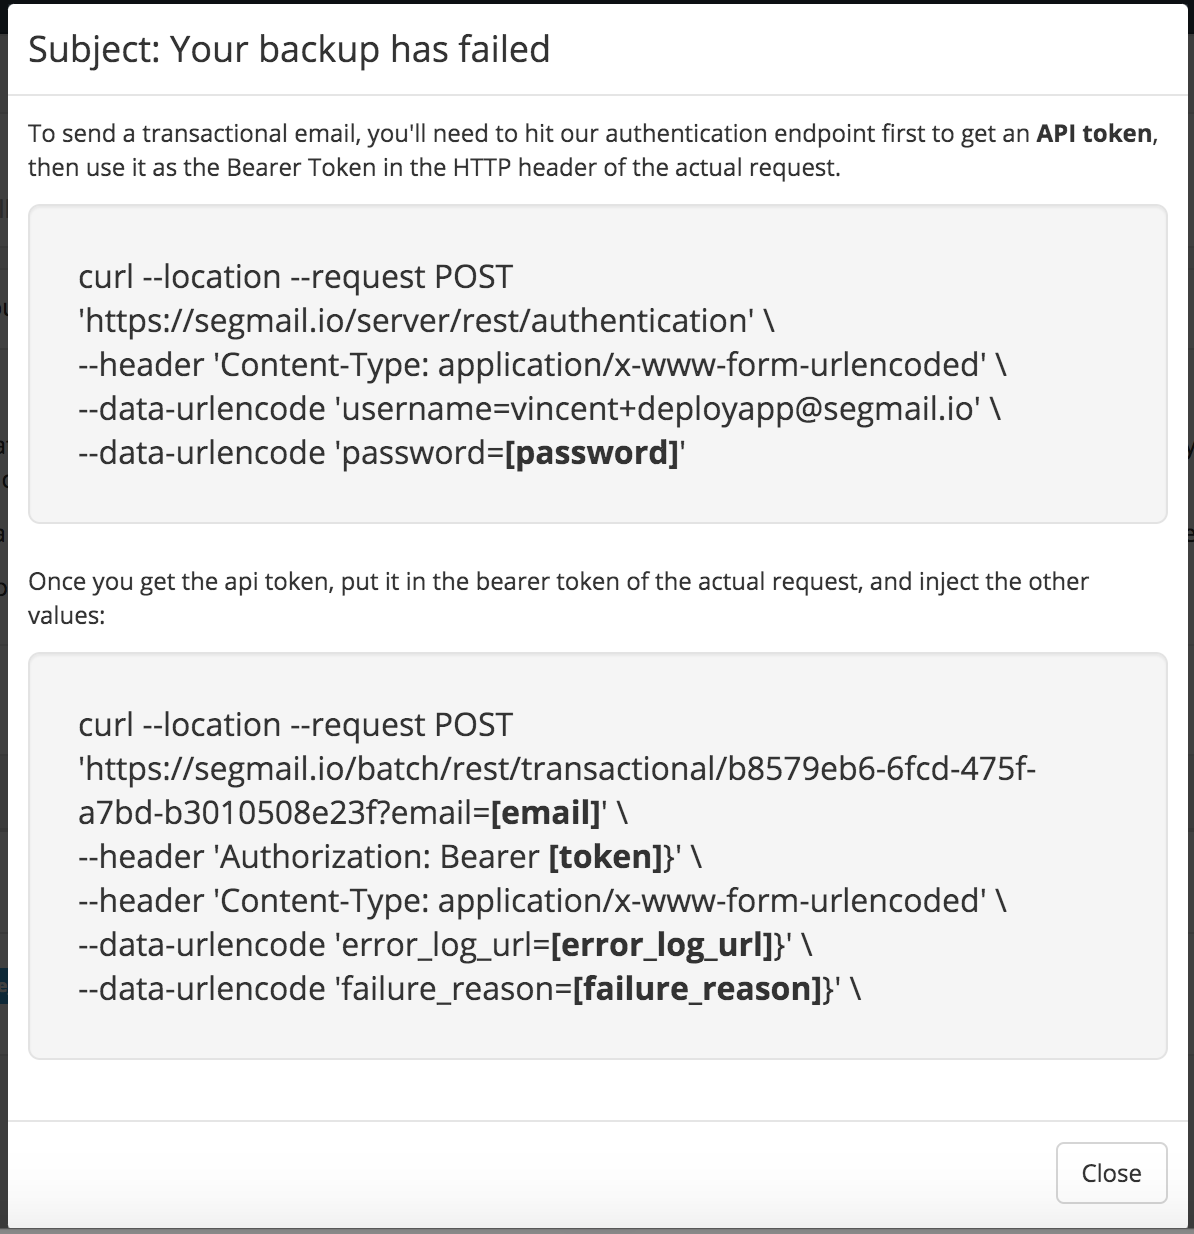
Before hitting the actual endpoint to send out the email, you will need to get your API token by calling the /authentication endpoint with your username and password. Once you have obtained this token, put it in the header in the way as provided by the popup.
Also provide the backup_url from your app as a form parameter in the request.
After hitting the endpoint, you should get a synchronous response of your request. You would see an error message if anything went wrong, for example:
{
"result": "error",
"error_message": "Subscriber test@email.com is not subscribed to the appropriate list."
}
This tells you that the given email is not subscribed to the list and therefore cannot be sent a transactional email.
If the sending was successful, you would get a success response as well as an emailId for tracking:
{
"result": "success",
"emailId": "bc9ffa89378090d2f6e53a046f2410a2b8bbc03715814be221a171eda8d28b81"
}
Here’s how the TEs look like in the Gmail app:

That’s it! Please feel free to chat with us using our chat widget on our landing page if you have any questions on Transactional Emails.